WE CURRENTLY HAVE A NEW UPDATED VERSION OF THIS ARTICLE
WE CURRENTLY HAVE A NEW UPDATED VERSION OF THIS ARTICLE
1) Accessing the administrative back-end for your website.
- Open your browser and go to: www.yoursite.com/administrator.
- Type in your username and password and log in.
2) You should now see an Administration page.
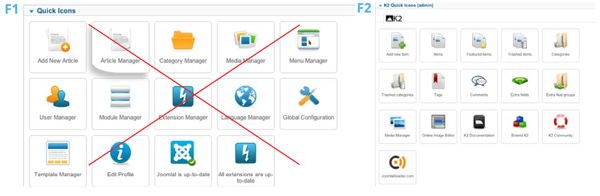
- If your Administration page is showing a “Quick Icons” listing as in figure 1 below, do not use this. Instead, click on the “K2 Quick Icons” drop down menu, located below the “Quick Icons” listing.
- You should now see a “K2 Quick Icons” listing as the one in figure 2 below.
- Click on the “Items” button in the “K2 Quick Icons” listing.
3) You should now see a listing of items, such as the example below.
- If you want to change or edit an item, click on the item for which you would like to do so.
- If you would like to create a new item, click on the orange “New” button, located above the listings.

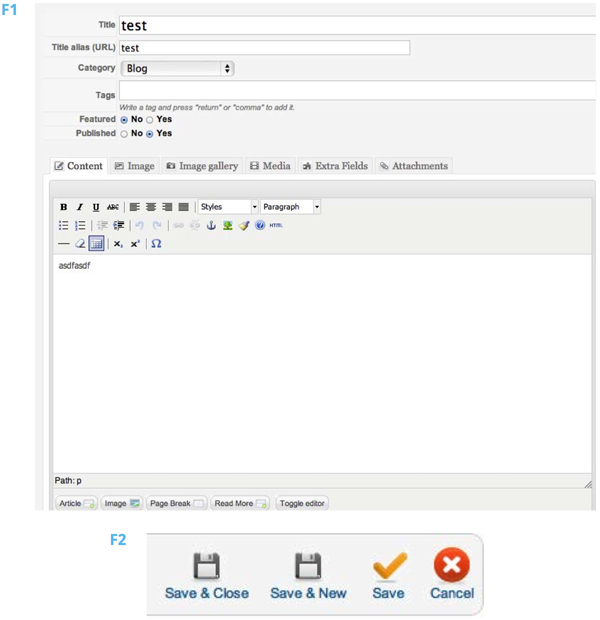
4) Once you’ve selected an item or opted to create a new item, you should see an editing screen similar to the one in the figure below.
- You can modify the title and/or content via the title text space at the top and the content text space at the bottom. Titles and content may or may not be used depending on how your site is configured.
- Use the category dropdown to choose the appropriate category to place the item under.
- Tags may be used depending on your website. Tags are often times used to link related items. You can use the “Tags” field in order to place tags on your items.
- Make sure to place a comma at the end of each tag in order to differentiate between tags.
- Whenever you edit anything in K2 click on the save button, which is marked by an orange check mark (shown below in figure 2).
- After saving you may click on the cancel button, marked by a red circle with an “x”, in order to leave the edit item page. (You can also click on the “Save & Close” button in order to do the same actions in one step).
5) If you would like to edit an image, click on the image tab, which is located next to the content tab.
- To select a new image, click on the “choose file” button and select the image you would like to display.
- It is important to click on the “Check this Box to delete current image or just upload a new image to replace the existing one” option when you are replacing images.
- Remember to click the orange save button in order to save any changes.

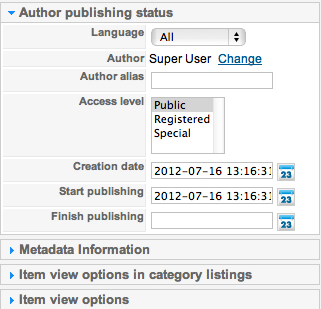
6) If you would like to edit your Author publishing status, look under the “author publishing status” drop menu, located on the right side of the page.
- If your website has features that restrict access for some users, you can change access levels for each item using the “Access level” field.
- You can change the Creation date (date your item was created), Start Publishing date (date you want your item to go public), and Finish Publishing date (date you want your item to no longer be visible to the public).
- We advise that you do not change these settings unless you specifically want to set certain time constraints for your items.
- Remember to click the orange save button in order to save any changes.
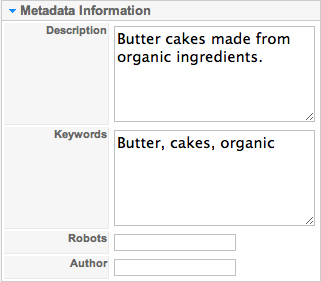
7) IF you would like to improve your SEO (Search Engine optimization), look under the “metadata information” drop menu, located on the right side of the page.
- You can type in descriptions and keywords in their respective fields in order to improve your search engine optimization.
- Unless you fully understand how SEO works, we advise that you do not enter anything in the “Robots” field.
- Remember to click the orange save button in order to save any changes.