WE CURRENTLY HAVE A NEW UPDATED VERSION OF THIS ARTICLE
PREPARING IMAGES
- When preparing images to upload, you should always resize the image to be either the exact size or a few pixels larger than its dimensions on your website.
- Never resize an image smaller than its dimensions on your website. This degrades the image.
UPLOADING IMAGES VIA MEDIA MANAGER
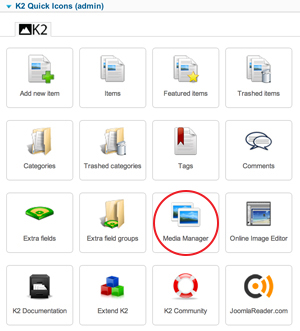
1) Open the Media Manager
- When you are ready to upload your images, click on the Media Manager selection under your K2 menu (shown below in red).
2) Create a folder
- It is esential to create folders and organize your images. In the upper left portion of the menu bar click on the “New Folder” button, marked by a folder with a green “plus” sign (shown below in red).
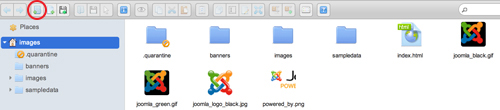
- If necessary, create folders within folders in order to organize your images. Typically, you will create a folder for each page (home, blog, about etc.) and within those folders you may have other folders that specify a certain date, title, section etc.
3) Upload files
- To the right of the “New Folder” button, is the “Upload Files” button, marked by a disk with a green “plus” sign (shown below in red).
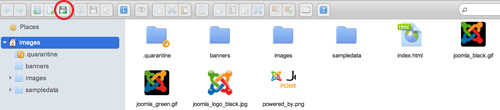
- This button will direct you to a window where you can select the file(s) you want to upload. After locating and selecting your files, click “Open” and your files will upload.
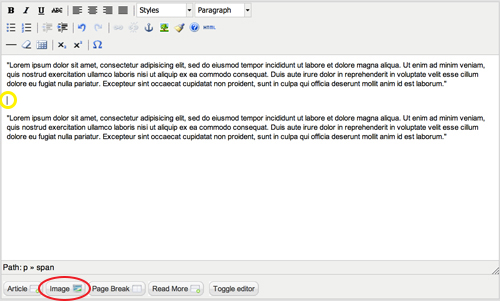
4) Placing images in K2 items or categories
- You can now place your images in a K2 Item or Category. Once you open up a K2 Item/Category (If you are confused on how to do this, see our tutorial on how to add and edit K2 Items) use your cursor, to click on the area in the text field where you want the image to be placed (shown in yellow). Click on the “Image” button, located towards the bottom left of the text field (shown in red).
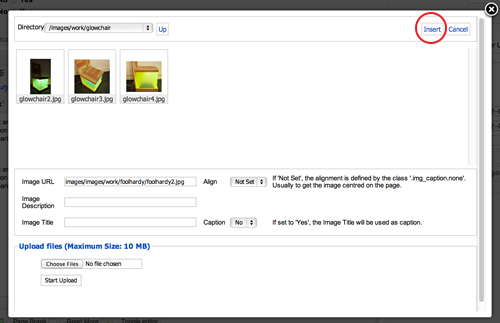
- You will now see a popup similar to the one below.
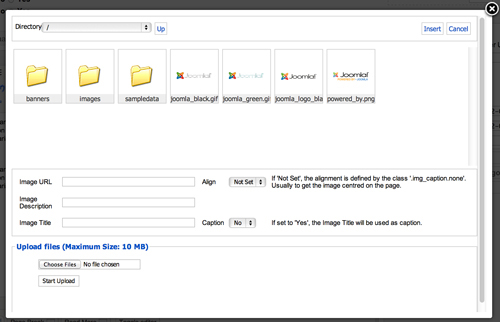
- Select the folder(s) where you placed your image. Once you have found your image, click on it and click the “Insert” button button in the upper right hand corner of the popup (shown below in red). You can add an image description and title in the marked fields, located below the image thumbnails. You can also select “Yes” under the “Caption” field in order to display the image title as a caption underneath your image.
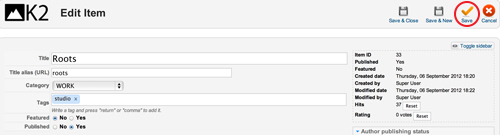
- Make sure to click on the “Save” button in the “Edit Items” screen (shown below) and your image should now be uploaded!
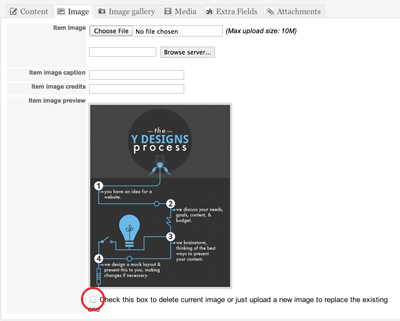
UPLOADING IMAGES VIA IMAGE TAB
- Aside from placing images in the text field, you can also upload an image via the image tab located next to the content/description tab (shown below in red).
- There can only be one image per item/category uploaded in this manner. This image is usually the main image for the given item/category.
- Just simply select “Choose File” (shown below in yellow) and find the file on your computer.
- When uploading images in this manner, you do not have to place the image in the media manager. You can simply locate the image on your computer.
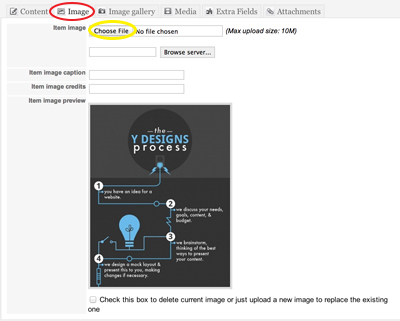
- If you would like to delete your main image, check the box located at the bottom (shown in red below), and click the orange save button.