How to Change / Create a New K2 Category
Tutorial by Max Olson
04.28.2015
WE CURRENTLY HAVE A NEW UPDATED VERSION OF THIS ARTICLE
1) Accessing the Administrative Back-end for Your Website.
- Open your browser and go to: www.yoursite.com/administrator.
- Type in your username and password and log in.
2) You should now see an Administration page.
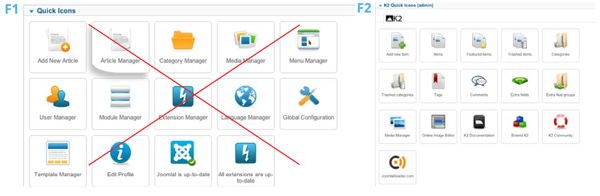
- If your Administration page is showing a “Quick Icons” listing as in figure 1 below, do not use this. Instead, click on the “K2 Quick Icons” drop down menu, located below the “Quick Icons” listing.
- You should now see a “K2 Quick Icons” listing as the one in figure 2 below.
- Click on the “Categories” button in the “K2 Quick Icons” listing.
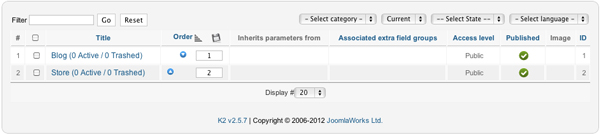
3) You should now see a listing of categories, such as the example below.
- If you want to change or edit a category, click on the category for which you would like to do so.
- If you would like to create a new category, click on the orange “New” button, located above the listings.
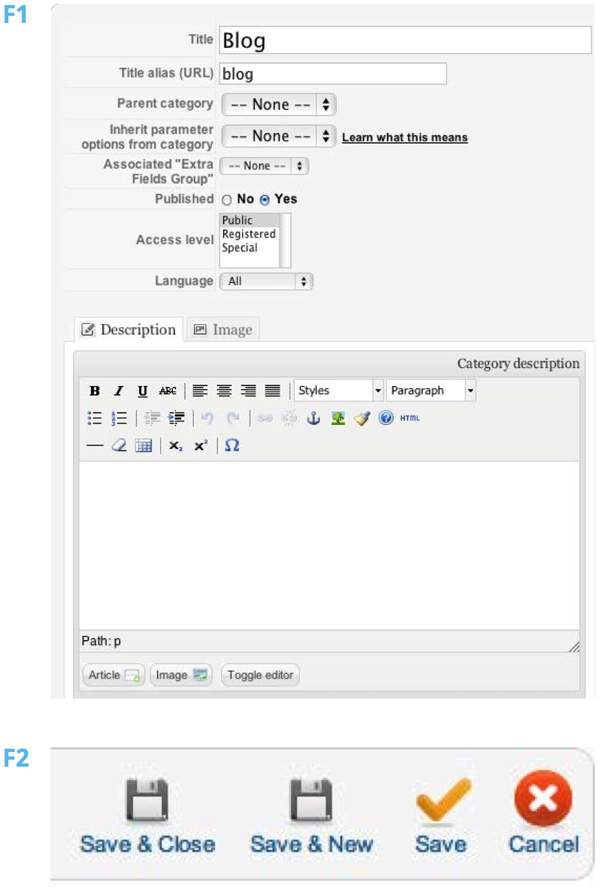
4) Once you’ve selected a category or opted to create a new category, you should see an editing screen similar to the one in the figure below.
- You can modify the title and/or description via the title text space at the top and the description text space at the bottom. Titles and descriptions may or may not be used depending on how your site is configured.
- Generally, creating a new category should be left to the developers, as it can be an involved process of choosing from many options on the right side of the control panel.
- A good way to copy an existing set of options is to use the “Inheret parameter options from category” drop-down, located in the same editing screen shown below. This allows you to configure the new category to the same specifications as the category you choose.
- Do not play with the “Associated Extra Fields Group” drop-down. This is for developers.
- Whenever you edit anything in K2 click on the save button, which is marked by an orange check mark (shown below in figure 2).
- After saving you may click on the cancel button, marked by a red circle with an “x”, in order to leave the edit category page. (You can also click on the “Save & Close” button in order to do the same actions in one step).
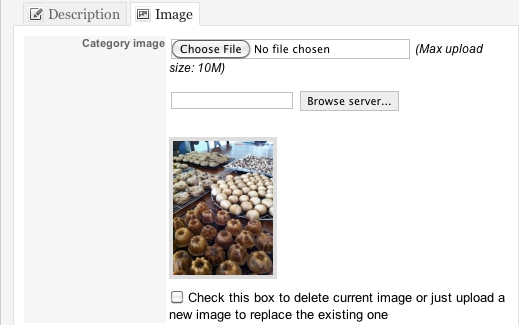
5) If you would like to edit an image, click on the image tab, which is located next to the description tab.
- To select a new image, click on the “choose file” button and select the image you would like to display.
- It is important to click on the “Check this Box to delete current image or just upload a new image to replace the existing one” option when you are replacing images.
- Remember to click the orange save button in order to save any changes.