

Joomla & K2 Online Image Editor: Preparing Images for the Web
If you don’t have Photoshop or other image editing software, the Online Image Editor featured in K2 is a comparable tool. The Online Image Editor has many features including filters and layer effects. However, in this tutorial I will be reviewing the basic features necessary for preparing images for the web.
Accessing K2 Online Image Editor
- Login to the administrative back-end for your website.
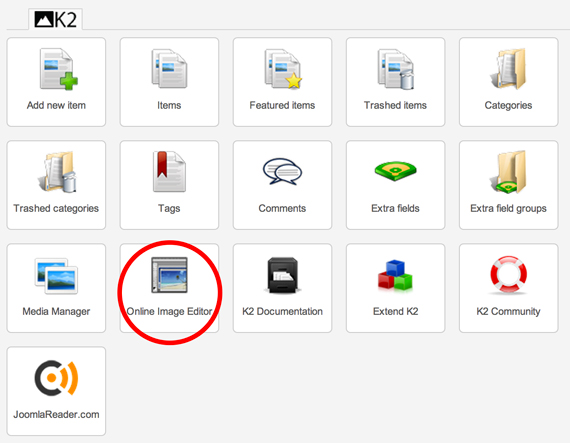
- Select “Open Image Editor” from the K2 Quick Icons (displayed below in red).
- You should now be taken to an external URL: splashup.com/splashup/
Using K2 Online Image Editor
Uploading an Image
- Upload an image by selecting “File” => “Open Image”.
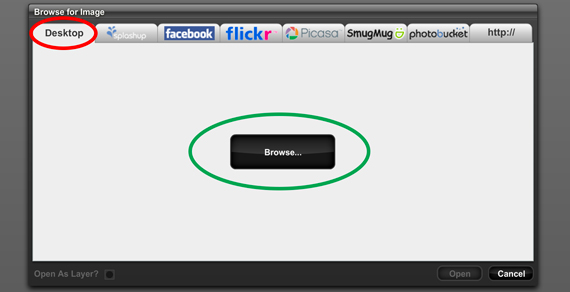
- A “Browse for Image” popup should appear. Across the top of the popup, there are several choices on how you can upload your image. Select “Desktop” (displayed below in red) in order to upload from your computer, and select “Browse” (displayed below in green).
- Choose the file you’d like to edit and select “Open”.
Tools Explained
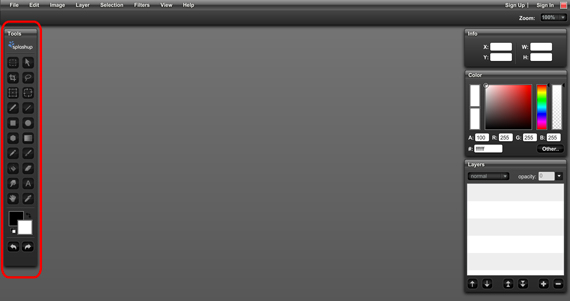
On the left-hand side of your interface, there should be a “Tools” panel (displayed below in red). Below are a few tools that can help you prepare your images for the web.
![]() Move Tool: Allows you to move objects on your artboard.
Move Tool: Allows you to move objects on your artboard.
![]() Crop Tool: Used to crop images.
Crop Tool: Used to crop images.
![]() Free Transform Tool: Used to transform and resize images.
Free Transform Tool: Used to transform and resize images.
![]() Rotate Tool: Used to rotate images. You can move the origin (the circle that appears in the middle of your image) to change the way the image is rotated.
Rotate Tool: Used to rotate images. You can move the origin (the circle that appears in the middle of your image) to change the way the image is rotated.
Resizing Images
- It is important to resize your images before you place them on your website. This decreases the size of your image files and therefore speeds up your website. You should always resize the image to be either the exact size or a few pixels larger than its dimensions on your website.
- Select “Image => Image Size”.
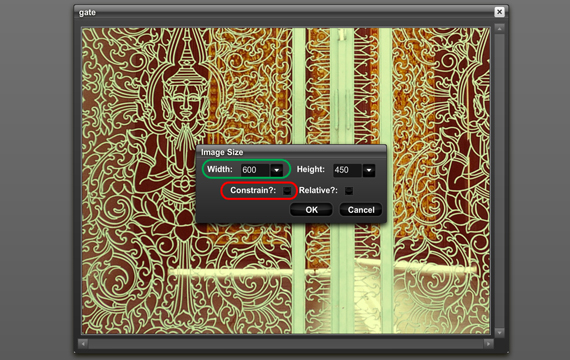
An “Image Size” popup will show up. Make sure to select “Constrain” (displayed below in red) before resizing so that you’re width and height are kept relative. - Image size within a website is usually based on width. Therefore, specify the width you’d like to resize the image to in the “Width” field (displayed below in green) and select “OK”. Because you have selected “Constrain” your height will automatically resize itself.
Saving and Exporting Images
- Select “File => Save Image”.
- Make sure the “Desktop” tab is selected and click “Save”.
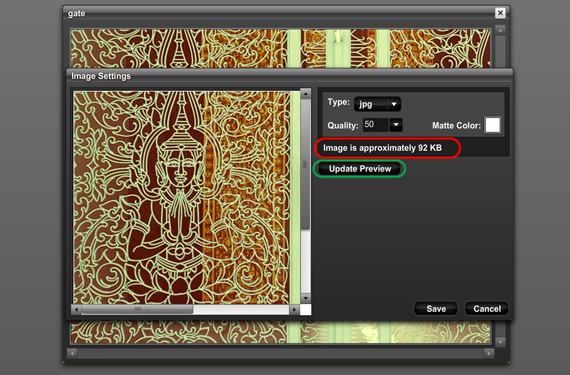
- An “Image Settings” popup should appear. Under “Type”, you can choose from three different file types, jpg, fxo, and png. I recommend choosing jpg, the standard for images on the web.
- Under “Quality” you can select the quality of your image. I recommend selecting anywhere between 50 – 100% depending on how large you’d like your files to be.
- You can check for the expected file size where it states “Image is approximately…” (displayed below in red). If you change the “Type” or “Quality”, select the “Update Preview” button (displayed below in green) in order to get a reestimate of the file size. I recommend that you keep file sizes below 300KB.
- When you are through making changes, select “Save” and select where you’d like your image to be saved to.
Your image is now ready to be uploaded to your website. Read our tutorial on how to upload images in K2 and Joomla. As an alternative, you may try other tools such as Pixlr or Fotor for your photo editing needs.


