Create an Album Cover: Andy Warhol Style
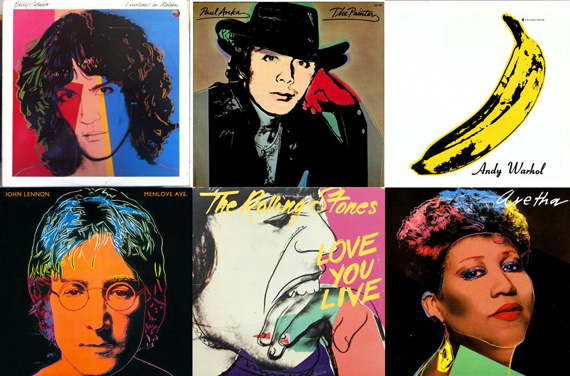
I’m sure all of you are familiar with Andy Warhol, one of the most prominent figures in the pop art movement. Warhol also designed many album covers for musicians such as the Velvet Underground, the Rolling Stones, John Lennon and Aretha Franklin. This tutorial will teach you how to you create an album cover, Andy Warhol style.
Step 1: Andy Warhol Style – Planning and Sketching
Warhol’s iconic design consists mainly of silkscreened images of people and everyday objects, bright colors, angular shapes, and hand drawn typography and lines.
Step 2: Alter the Image
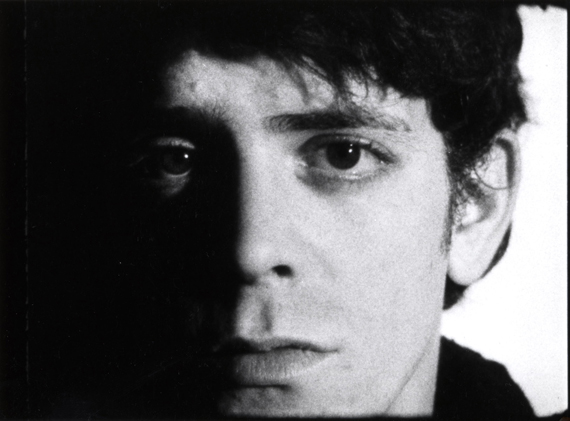
Usually I’d tell you to begin by working on the basic layout of the album cover. However, because Andy Warhol’s designs are mainly based on the object itself, I’m going to start by manipulating the image. I will be working from this photograph of Lou Reed which was actually taken by Warhol with a 16mm film camera.
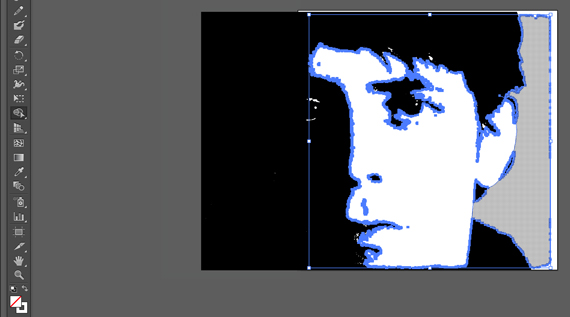
Begin by placing the image in Illustrator. Open the “Image Trace” options. I set the “Threshold” to about 100 and under the “Advanced” settings I set “Paths” and “Corners” to their maximum and “Noise” to its minimum. The best thing to do is to play with different settings and see what works best with your image. Once you’re ready select “Trace”.
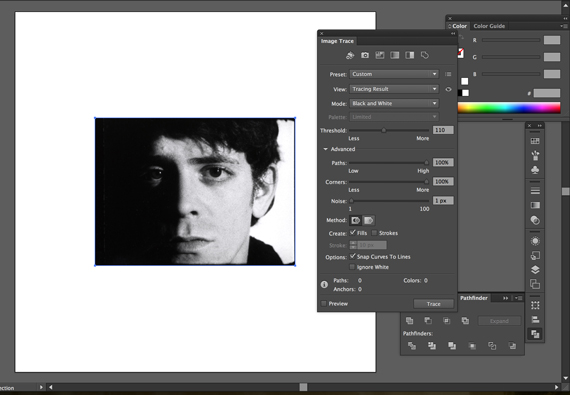
Now expand your image by highlighting your image and selecting “Expand”.
So far so good. However, the white portion of the image is one object, so I can’t separate the face from the background. Outline the right side of Lou’s face using the “Pen Tool”; creating Lou’s ear and neck.
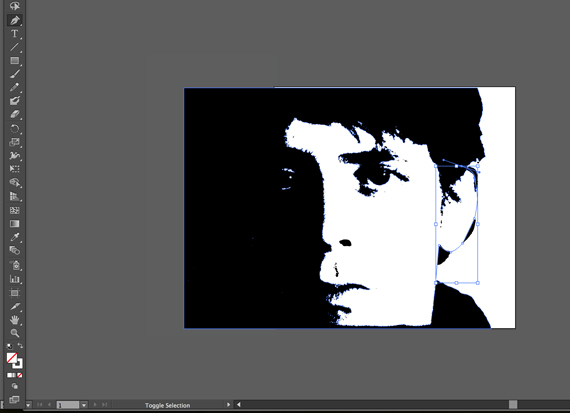
Now with these newly created lines and the white portion of the image selected, use the “Shape Builder Tool” to select the background area. Lou’s face is now separate from the background. You can change the color of the background to your liking.
Step 3: Create a Frame
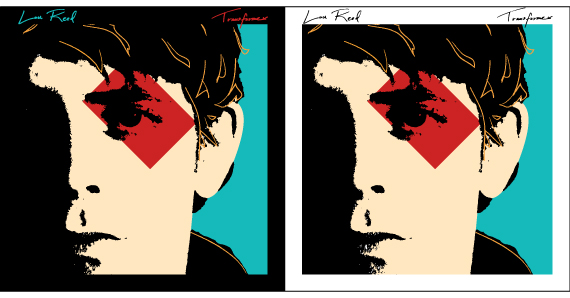
I like the framed layout Warhol created for Billy Squier’s album “Emotions in Motions”. We can create a frame using two squares. Simply draw two squares with the smaller one above the larger one (see F1). Select both squares and use the “Minus Front” selection within the “Pathfinder Tool” in order to cut one square from the other (displayed below in blue). Place this frame in the topmost layer. Now it’s easy to move your artwork around in order to get the right composition (see F2).
Step 4: Details, Details, Details
Next lets add some of the hand drawn lines that Warhol often incorporates in his album covers. These lines are usually used to highlight certain parts of the hair, clothing, and faces.
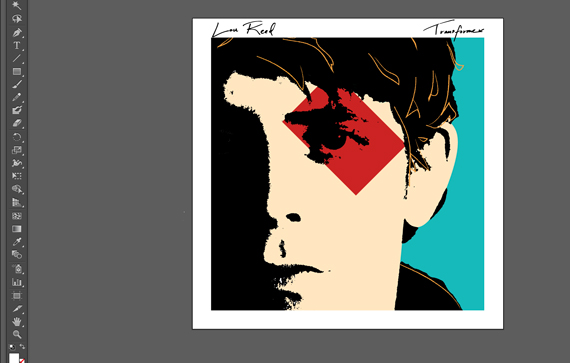
Select the “Paintbrush Tool” and under “Brush Definition” select “Charcoal – Pencil” (displayed below in red). Now begin creating some lines in the hair and face. These are meant to be hand drawn lines so they don’t have to be perfect. In fact, it looks more natural if you do them quickly.
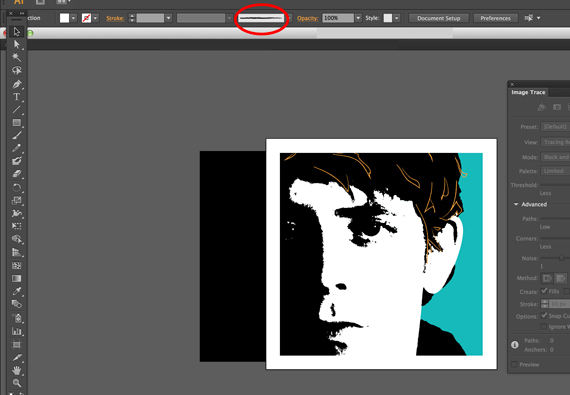
Warhol often adds angular shapes and lines in his pieces. I’m going to add a red rectangle over Lou’s eye just as an element of surprise.
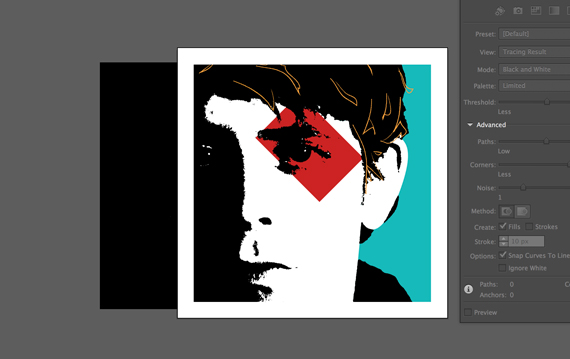
You may notice that there are some white spots within the black areas of Lou’s face. I’m going to clean these up by deleting them. I also decided to completely get rid of the right eye so that the right side of Lou’s face is covered in shadow.
Warhol uses certain pinks and flesh tones in his characters’ faces. His female portraits often contain bright red lips. Feel free to incorporate these characteristics to your album cover.
Step 5: Typography
Warhol also uses hand-drawn typography in his album covers. You can do the same using pen and paper to write out your type, scan this image into your computer, and use the “Image Trace” and “Expand” options we used earlier in Illustrator in order to vectorize your type.
Step 6: Andy Warhol Style – Variations
The screen printing techniques used in Warhol’s work allowed him to make many variations of his pieces. Well you have Illustrator on your side so feel free to try out different color variations and see what looks best. I created a version with a black border.

Create an Album Cover – Conclusion
And there you have it. You can now create an album cover, Andy Warhol style. Have fun with colors and get crazy with it.
Illustrator Fundamentals Course might help you if you’re having trouble following these steps. Also, checkout our other related posts below. We offer other Illustrator tutorials too.

