

Comic Book Art in Photoshop
Comic book art has come a long way since the first comic book was introduced in 1933. Now a widely respected art form, comic book art has made it’s way out of the framed storyboard and into mainstream media and art. Just like any artform, every comic artist has their own style. Therefore, I can’t tell you that this is THE WAY of creating comic book art. This is just the way I’ve decided to go about it. If other techniques or ideas come to mind then i recommend you give it a go!
Step 1: Sketching
Now I can’t teach you how to sketch. Sketching takes a lot of practice, especially when you’re trying to develop your own style. There are so many ways you can go about it and all I can recommend is to practice a lot. If you look at an illustrator’s sketchbook, they have pages filled with hundreds of hands in different positions. Just like anything it’s all about repetition.
I use a pencil to get my initial ideas down on paper and then use pen or ink for my finished product. It’s best to be loose about your sketching.
Step 2: Scanning and preparing your sketch
Once you’re done sketching, scan your sketch into your computer. I recommend scanning at a fairly large resolution. This way, if you need to make larger versions of your piece, maybe for a poster, the image will not lose quality.
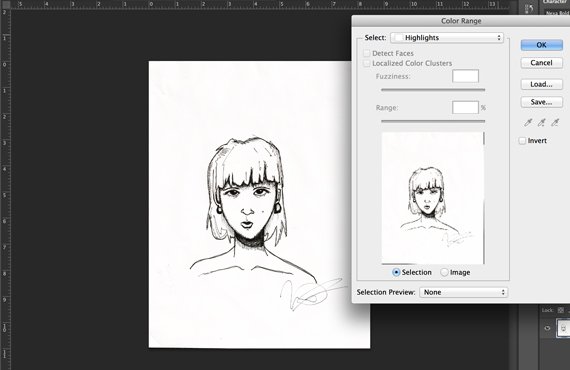
Open your sketch in Photoshop. In order to get rid of the paper color, select “Black & White” from the fill/adjustment layer icon below the layers panel (see F1). Now using the fill/adjustment layer icon again, select “Brightness/Contrast”. I usually bump my contrast all the way up to 100 and adjust the brightness slightly until the paper is a solid white color (see F2). Merge these layers.

Now go up to “Select => Color Range”. Either use the eyedropper in order to select the white background or just select “Highlights” from the “Select” dropdown (displayed below). Once the white background is selected, delete it from your image using the “delete” button.
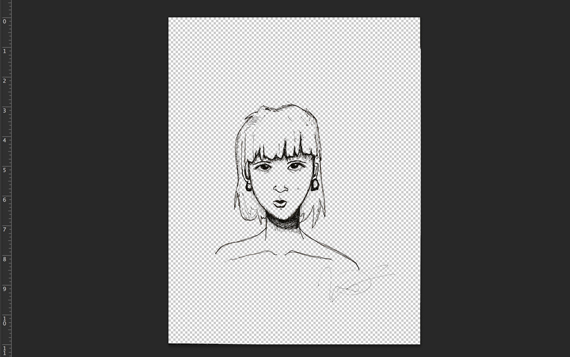
Your image should now contain the sketched lines with a transparent background.
Step 3: Adding Color to Comic Book Art
Now we are going to add layers underneath the layer we just created. We will add colors to these layers so that the sketched lines remain above the colors.
I usually use the “Paintbrush Tool” with a softer bush. I work from light to dark (displayed below). Remember it’s not a coloring book so be artful about it, there’s no wrong or right way of doing this.
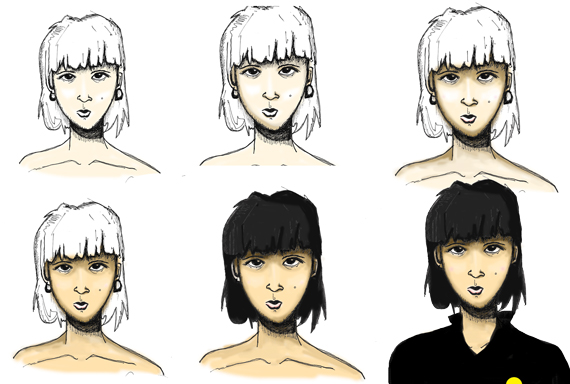
I’m going to select a slightly darker shade and go over the spots that will be shaded such as the area around the eyes, sides of the forehead, and underneath the chin and cheeks. Finally I grab an even darker shade and go over the areas where the darkness will be even more accentuated.
If you need to add highlights, use a very light color (almost white) and go over these spots. These can be on the tip of the nose, points on the cheeks, and above the eyebrows.
Add colors wherever necessary, maybe to the eyes, lips, cheeks, or hair.
Step 4: Comic Book Cover
Now let’s place the character into a comic book cover. Just for fun, I’m going to base my character off of the Flaming Lips album, “Yoshimi Battles the Pink Robots”.
First, let’s place the basic shapes that will make the general layout. Using the “Rectangle Tool”, I’ll create a rectangle with a red fill (to hold the title text) and a rectangle with a black stroke (to act as a border for the comic book cover).
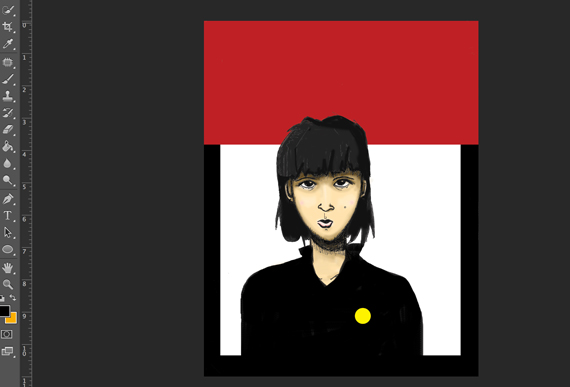
Now we’ll add title text. The title should be prominent. Therefore, it’s best to choose fonts that are either bold or tall. I’m using a tall font and adding a decent amount of letter-spacing.
Because Yoshimi is a Japanese character, I’ll rotate the second part of the title by 90-degrees in order to mimic vertical Japanese text.
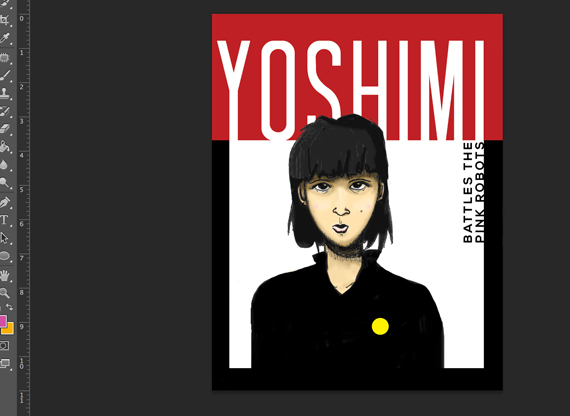
A note on creating interesting compositions is to think outside the box. Centered text is not always the best way to go. Interesting compositions break rules by featuring different alignments and paragraph structures.
Step 5: The Extras
Now let’s add some pink robots to the background. When I’m not working from a sketch or photograph, I like to create most of my illustrative pieces in Adobe Illustrator. Using solely the “Rectangle Tool” and “Ellipse Tool” I was able to create this robot.
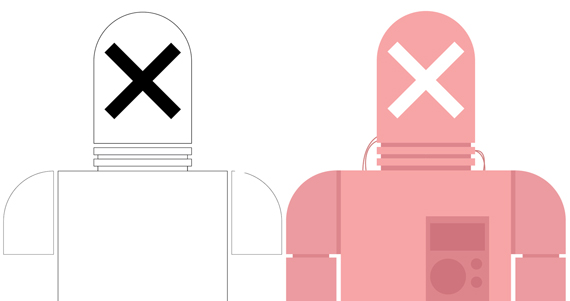
Now I’ll copy the robot from Illustrator and paste it into Photoshop. Duplicate the robot a few times and place them behind Yoshimi.
Conclusion – Comic Book Art in Photoshop
There you have it! Now you can create some cool comic book art and comic book covers. Remember, half the fun is coming up with your own style of work. Practice your technique and develop your style.
If you still don’t feel comfortable enough to follow this tutorial, you might want to checkout the Photoshop Fundamentals course at Lynda: PhotoShop Fundamentals


